Uploading Blu-ray/DVDs to iCloud Drive for Viewing Anywhere
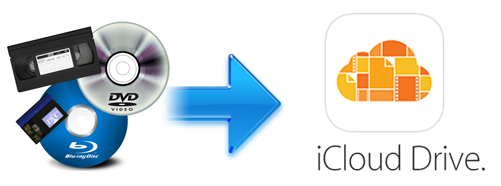
Apple's iCloud Drive is one of the coolest new features to come from the company in a long time. Only a iCloud account, you're allowed to store, sync and update data between your Apple devices like iPhone/iPad/iPod. In general, you'll automatically get 5GBs of storage for free, but you can also choose to increase your storage with a monthly subscription. Back to the point, supposing you have a myriad of Blu-ray/DVD collections, are you annoyed with pulling Blu-ray/DVD discs in and out over and over again? Ever worried about scratching or damaging Blu-ray/DVD discs by using repeatedly? Want to watch Blu-ray/DVD movies on your iPad/iPhone/iPod while on the trip? Then iCloud Drive might be your optimal choice. This article aims to show you how to upload Blu-ray/DVD to iCloud Drive. Keep reading on...
To put your Blu-ray/DVD movies, there are two basic issues to be solved. One you need to rip the movies contents off of your Blu-ray/DVD discs initially. Two, you also have to convert the ripped Blu-ray/DVD movies to iCloud Drive compatible video formats like MP4, MOV, etc for smoothly uploading. In view of the complicated Blu-ray/DVD copy protections involved with the majority of Blu-ray/DVD discs, as well as the desirable converting speed and quality, you're highly recommended to turn to a robust yet professional Blu-ray/DVD Ripper like Brorsoft Blu-ray Ripper for Mac for help.
With its help, you can effortlessly get around the kinds of Blu-ray/DVD copy protections and convert them to iCloud Drive compatible video formats MOV, MP4 as well as other popular formats, like AVI, MKV, M3U8, H.265, WMV, MPG, FLV, SWF, M4V, etc. Besides iCloud Drive, you're also allowed to convert your Blu-ray/DVD collections to store or share on Google Drive, DropBox, OneDrive or other cloud storage. For the video size limit of iCloud Drive, the built-in editor also assists you to extract DVD/Blu-ray clips with the very part you want. Or, you can just choose to rip certain chapters of a DVD/Blu-ray as you like. For converting DVDs/Blu-rays on Windows PC, you need turn to Blu-ray Ripper. Just download it and follow the guide to copy Blu-ray to iCloud Drive.


Simple steps to upload DVD/Blu-ray movies to iCloud Drive
1. Add DVD/Blu-ray Movies
Install and launch the best Blu-ray converter, then click "disc" button to import the DVD/Blu-ray movies that you want to import to iCloud Drive. After the files are loaded, you can preview them on the right and take snapshots of any movie scenes.

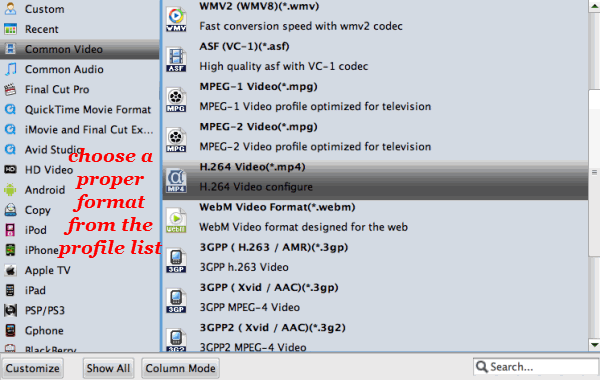
2. Output settings
Click "Format" to select an output format. You can either choose MP4, MOV as the output format or select the icon of a iDevice like iPad to get videos with optimized settings.
3. Tweak video and audio settings
Click Settings icon, it lets you make adjustments to the video settings. For example, lowering the frame rate can help reduce the file size. You'd better keep the balance of your video quality and video size.
4. Start ripping DVD/Blu-ray on Mac
Click "Convert" button to start ripping DVD/Blu-ray movie to digital video on Mac OS X. After conversion, click "Open" to find converted video for storing on iCloud Drive at your will.
Related Products
Blu-ray Ripper for Mac


Useful Tips
- Rip DVDs for Plex
- Rip Blu-ray for Plex
- Rip DVD for DLNA
- Rip Blu-ray for DLNA
- Upload DVD to iTunes
- Upload Blu-ray to iTunes
- Upload DVD to iCloud
- Upload Blu-ray to iCloud
- Upload DVD to Dropbox
- Upload Blu-ray Dropbox
- Rip DVD for Emby Server
- Rip Blu-ray for Emby Server
- Upload DVD to Google Drive
- Copy DVD to Synology NAS
- Copy DVDs to Drobo 5n NAS
- Store Blu-ray to NAS
- Copy Blu-ray to Seagate
- Copy Blu-ray to USB Flash Drive
- Blu-ray & DVD to WD MyCloud
- Copy DVD to Q-BOX 4K TV Box
- Backup Blu-ray and DVD to MediaFire
- Store and Upload Blu-ray and DVD Movies to OpenDrive
- Upload Blu-ray and DVD Movies to OneDrive
- Upload Blu-ray Movies to MEGA Cloud
- Backup DVD Movies to MEGA Cloud
- Rip DVD to SSD
- Rip and Backup Blu-ray to SSD
- Copy DVD Main Movie Only
- Backup DVD Whole Structure
- Copy Blu-ray Main Movie Only
- Backup Blu-ray Whole Structure
- Rip DVD on Windows 10
- Rip Blu-ray on Windows 10
- Rip DVD on macOS Sierra
- Rip Blu-ray on macOS Sierra
Copy/Backup DVD
Copy/Backup Blu-ray
General Solution
Social Connection
Copyright © Brorsoft Studio. All Rights Reserved.