How to Insert FLV Video into PowerPoint for Playing

When you make presentations using PowerPoint, you always insert some media to make the PPT more interesting and appealing, right? But the video format supported by PowerPoint is limited and FLV is not in the supported lists of all PowerPoint versions (including PowerPoint PPT 2016, 2010, 2003, 2007 or lower version). Then what if we have downloaded some FLV videos from YouTube or other video sharing websites and want to insert them into PowerPoint for making a good presentations?
Read More: How to embed part of a DVD into PowerPoint | How to embed MKV videos into PowerPoint
As we all know, the best format that all PowerPoint versions can support are AVI and WMV, which are created by Microsoft itself. So if you want to insert an FLV video into PowerPoint for presentation, you'll need to convert FLV to AVI or WMV and then add the converted video to PPT for playing. The following guide instruct you how to add FLV to PowerPoint.
Part I. Convert FLV to PowerPoint supported video formats
To accomplish the task, you need to seek help from a FLV Video converter that supports the FLV video input and WMV, AVI output. Here Brorsoft Video Converter Ultimate is highly recommended to help you achieve your task. This program can help you easily and quickly encode FLV videos to PowerPoint friendly AVI, WMV while keeping the excellent output quality. Plus, with it you can also convert FLV video to any other popular video formats, such as MOV, MPEG, DivX, XviD, 3GP, VOB, etc. Besides, the built-in video editor lets you personalize your video. If you insert FLV video into PPT on Mac(El Capitan), turn to Brorsoft iMedia Converter for Mac. Now, please download the most suitable program according to your need and follow the corresponding tutorial.
Step 1: First, launch the FLV to PPT converter. Click the Add Files button on the main interface to import FLV videos that you want to insert into PowerPoint. The program supports batch conversion, so you can add a pile of videos to enjoy the fast conversion speed.
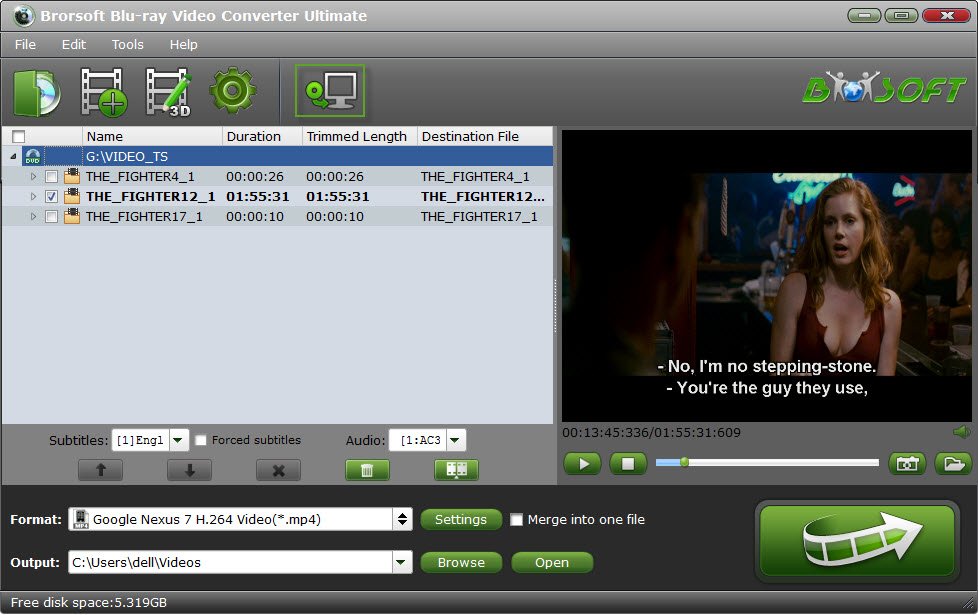
Step 2: Now you should go to the Output Format drop-down list, choose WMV or AVI as the output format on the Format > Common Video list.
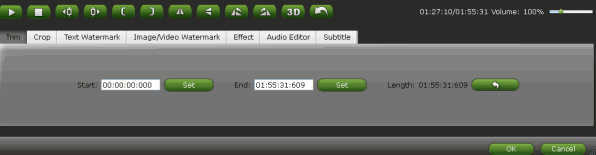
Tips: If you want to get rid of some part of the video, you can click the Edit button. When enter the edit > Trim interface, you should either drag the slider bar back and forth or set the start time and the end time for the video to get the part you want.
Step 3: After everything is ready, you should press the big, shiny "Convert" button to begin the YouTube video conversion.
Once the video is saved as an AVI or WMV file, switch to PowerPoint and choose Insert - > Movie - > "Movie from file" to put the YouTube video into the current slide.
Part II. Embed converted FLV video in PowerPoint
Before starting adding video to PowerPoint, you need to create a folder and put both your converted video and your PowerPoint presentation in this folder. Then open the PowerPoint in this folder to insert the converted video file which is just located in this folder.
For PowerPoint 2007 and higher, select Insert tab from ribbon, and click Movie and select the converted file to insert into PowerPoint for playback.
For PowerPoint 2003 and lower, from menu, select Insert -> Movies and Sounds -> Movie from File..., and select the converted file to insert into PowerPoint.
Related Products
Video Converter Ultimate


Useful Tips
Social Connection
Copyright © 2009- Brorsoft Studio. All Rights Reserved.