How to Add Subtitles to Videos with Windows Movie Maker

As is well acknowledged, Windows Movie Maker is an excellent video editing software, which offers users the ability to edit and create own masterpiece with such amazing features as special effects, transitions and timeline narrations. While do you know the program also has another wonderful feature of adding subtitles to a video clip? For the sake of making the best use of Windows Movie Maker, this article aims to provide a detailed instruction on how to add subtitles to any project using Windows Movie Maker.
Steps of Adding Subtitle to Videos with Windows Movie Maker
First of all, you need to download Windows Movie Maker and install it to your computer. Once successfully installed, you can start the process. Read the following straightforward steps in adding subtitle to your video in Windows Movie Maker:
Step 1: Import the video
Open Windows Movie Maker and click "Videos" from the Import menu, located in the column on the left. If the video file is being stored on a digital video camera, click "From digital video camera." The Import Media Items dialogue box will open.
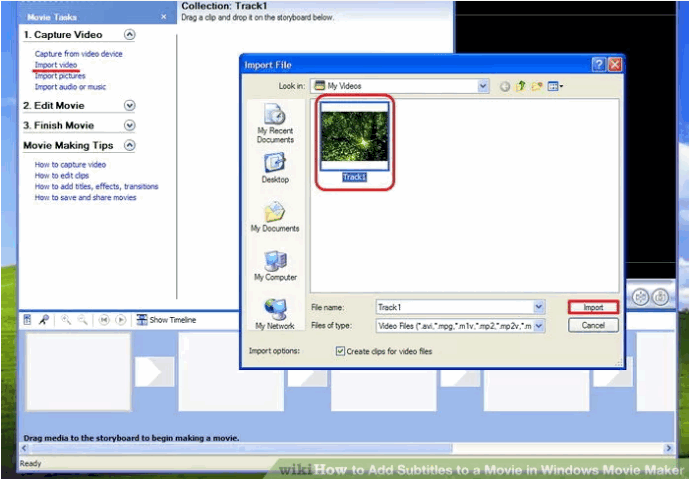
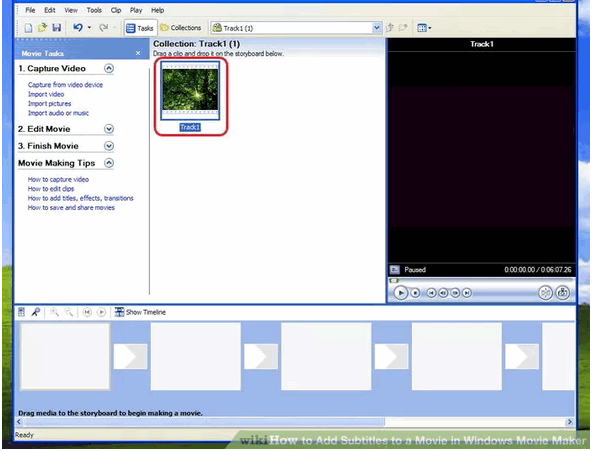
* Locate the video file saved to your computer hard drive or on your digital video camera and double click the file to import it into Movie Maker. Your video will now be visible in the collections folder, located just above the editing timelines in between the Tasks menu and the preview display. The video file has been imported.
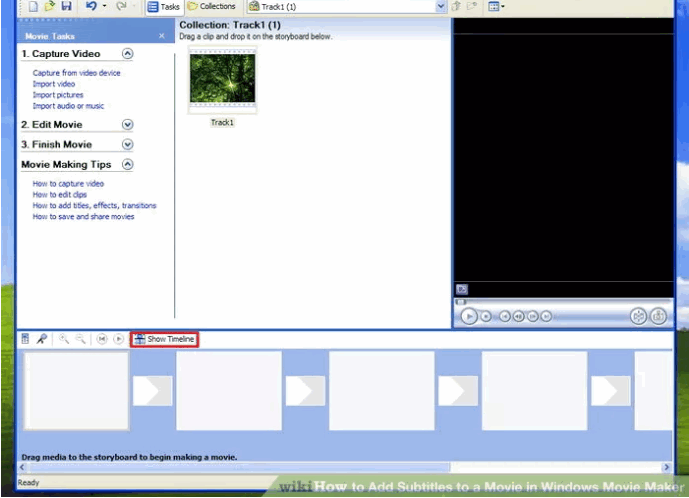
Step 2: Change the view from "Storyboard" to "Timeline."
In order to adjust the position or change the timing of subtitles for a Movie Maker project, the application window view needs to be set to Timeline view. Click the View tab on the menu bar and confirm that Timeline is selected on the menu options. The application view settings have been set to Timeline view.
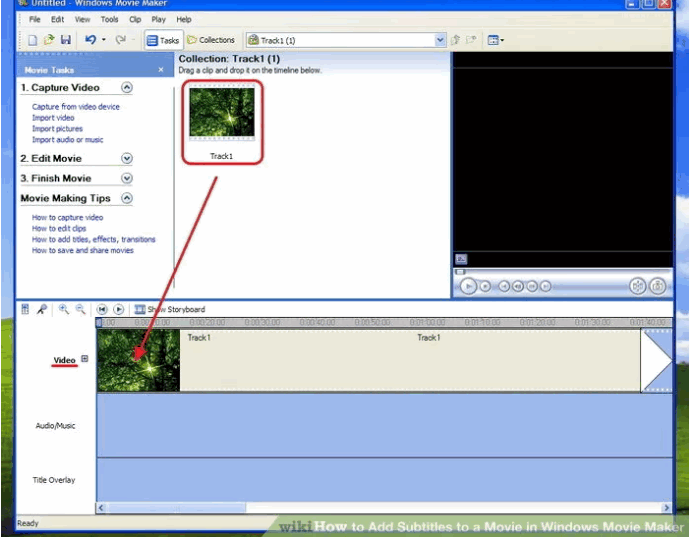
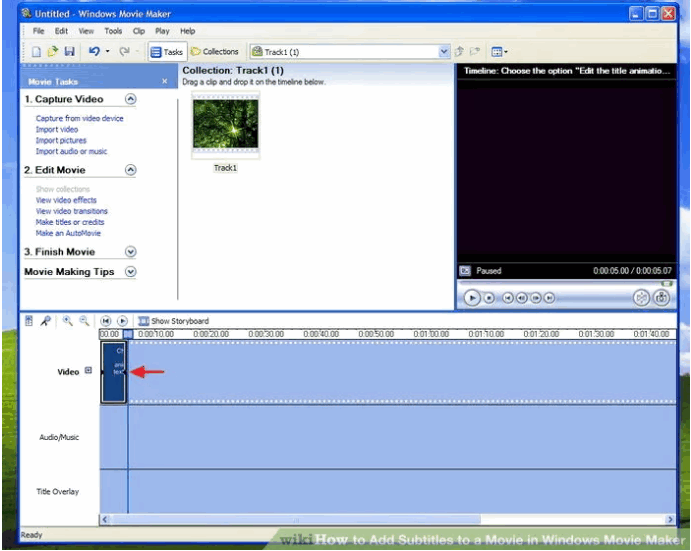
Step 3: Insert the video file into the video editing timeline
Notice that there are now 3 editing timelines that run horizontally across the bottom of the application window, one stacked on top of the other. The editing timeline on top is labeled "Video," the next one down is labeled "Audio," and the editing timeline on the bottom is labeled "Title Overlay." Click the video file in the Collections folder and drag it into the editing timeline labeled "Video." The video now appears inside the Video editing timeline.
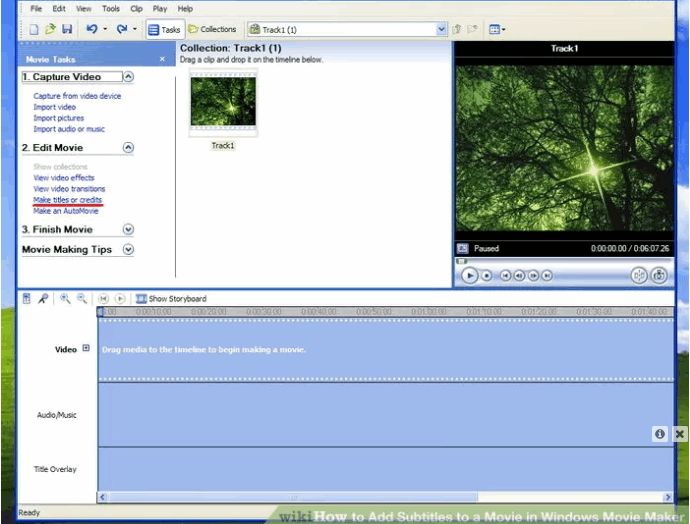
Step 4: Insert the title overlay to use for the first set of subtitles
Once the title overlay has been inserted, it can be repositioned anywhere within the timeline. Click on Titles and Credits, located in the Edit menu in the column on the left. You will be asked where you want to insert the title. Select "Title on the selected clip" from the list of options available. When prompted to enter the text for the title, type the first set of subtitles you wish to add to the video into the empty field.
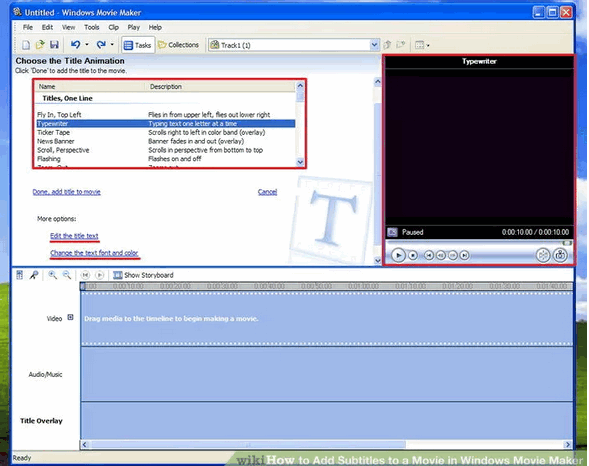
* Choose the option "Edit the title animation" once the text has been entered. The Title Animation menu will appear. Scroll down the list of available animations and click on "Subtitles." Under "More options," click the option to change the text and the font color. The font formatting menu will now appear. From the font menu, choose a font that it simple and easy to read, such as "Arial" or "Times New Roman." The chosen font will now be visible in the preview display on the right side of the application window.
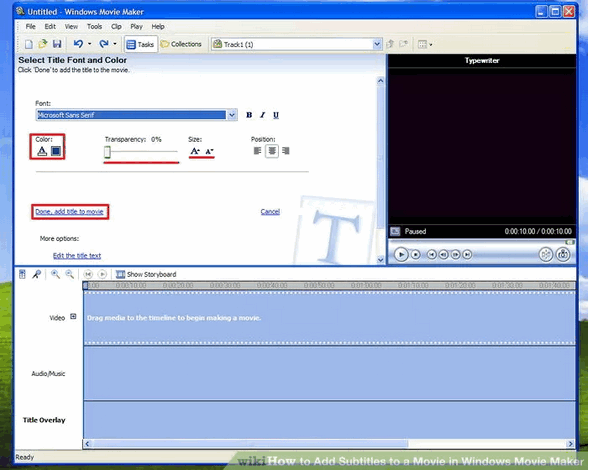
* Adjust the size of the font, if necessary, using the up or down pointing arrows located beneath the Font menu. The color of the font, as well as the transparency level and the justification, can all be adjusted from this menu. Experiment with different adjustments to suit your particular needs or preferences. Click the Add Title button when you are ready to continue. The subtitle overlay will now appear in the Title overlay editing timeline running across the bottom of the application window. The title overlay for the first set of subtitles has been inserted.
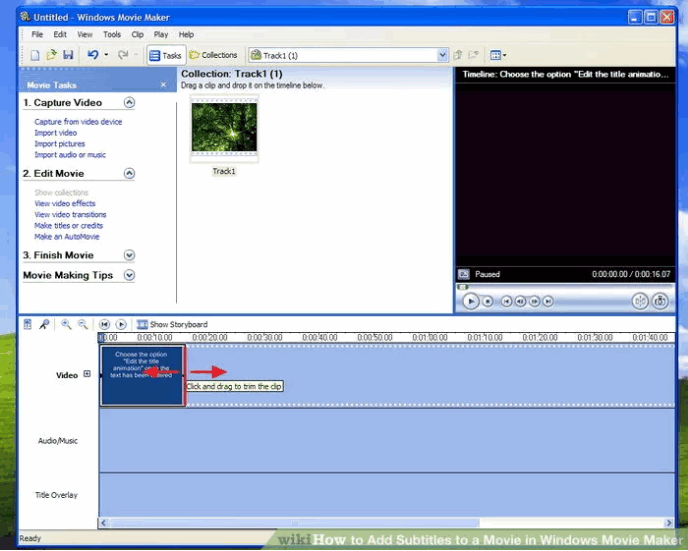
Step 5: Move the first subtitle into position
Locate the point in the video clip where you would like the subtitles to begin. Click and drag the Title overlay into any position in the editing timeline. Preview the positioning of the first set of subtitles by clicking the "Play timeline" arrow, located above the Video editing timeline on the far left side of the application window. Drag the Title overlay to the left or to the right to adjust the positioning of the first set of subtitles. The first set of subtitles is in position.
Step 6: Adjust the length of the subtitle
The length of time the subtitle appears on the screen can be adjusted by dragging the edge of the Title overlay to the left to make it shorter, or to the right to make it longer. Adjust the length of the title overlay to match the video clip. The length of the subtitle has been adjusted.'
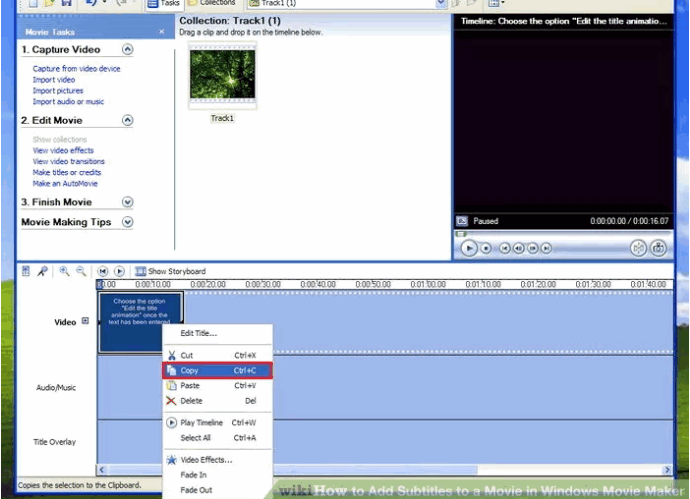
Step 7: Create the second set of subtitles. Right click on the first set of subtitles and select copy from the pull-down menu. Click inside the empty space in the Title overlay editing timeline, just to the right of the first set of subtitles, and click Paste. A copy of the first set of subtitles will now appear in the Title overlay editing timeline. Double click the copy. The Title Overlay editing menu will open in the application window.
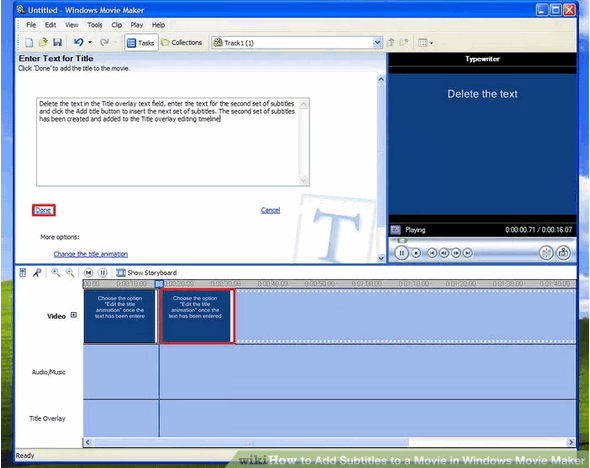
* Delete the text in the Title overlay text field, enter the text for the second set of subtitles and click the Add title button to insert the next set of subtitles. The second set of subtitles has been created and added to the Title overlay editing timeline. Adjust the position of the second set of subtitles as necessary. The second set of subtitles has been created.
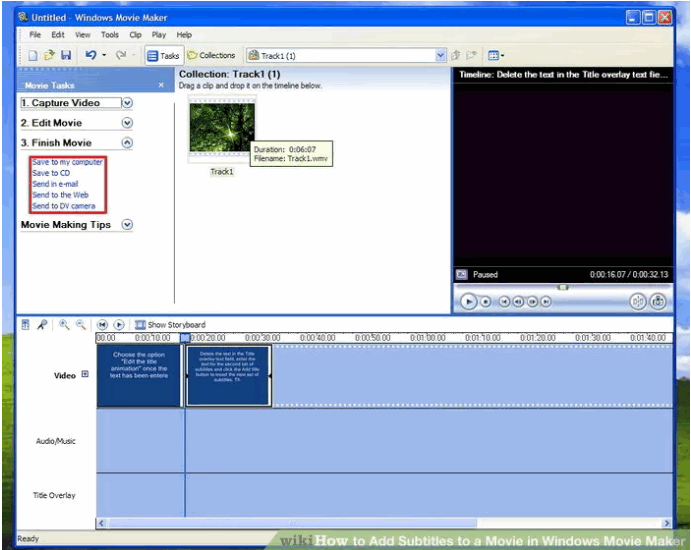
Step 8: Finish adding the subtitles
Continue the process, as necessary, until all of the subtitles you wish to add to the video have been formatted, inserted and moved into the correct position. Save the file on your computer as a Movie Maker Project or export the file as a Windows Media Video, which can be uploaded to the Internet. All of the subtitles have been added to the Movie Maker Video.
Alternative Way to Add Subtitles to Video
If you are short of options for adding subtitle to your video, Brorsoft Video Converter Ultimate will be a good alternative. It has all that you will be looking for to make everything easy including a tutorial. Users are allowed to add subtitle to video with external .srt, .ssa, .ass subtitle files easily. All these options can be found in the Subtitle tab. When you are making an educational video or adding subtitles to a multi-language movie, you will find this program extremely useful and convenient. If you're a Mac, please turn to Brorsoft iMedia Converter for Mac, which has the same function as the Windows version.


User Guide to Add Subtitle to Videos with Brorsoft Video Converter Ultimate:
Step 1. Load Files
After installing and running the program, you can import the video files to the program by directly dragging or clicking "File" to add the source video files.
Note: make sure the subtitle and the video have the same name and they are kept in the same file.
Step 2. Embed subtitles into video
Click on "Edit" button, the video editor will pop up. Tap "Subtitle" option and check the "Enable" icon. Then, by clicking on "Browse" to import your *.srt, *.ass, *.ssa subtitle file you've downloaded. After that, you can have a preview of the subtitle effect to make sure all goes OK . Make sure you have added the right subtitle that goes well with your video file.
Tip: You can also add watermark, apply effects, and crop, trim your video files in the above video editing window.
Step 3. Save Video
After adding subtitles to your videos, you can hit the "Convert" button to save it.
Related Products
Video Converter Ultimate


Useful Tips
Social Connection
Copyright © 2009- Brorsoft Studio. All Rights Reserved.